This video shows how to make easy cheap washi tape, out of stuff you have at home. I hope you enjoy and if you have any different ideas, please let me know.
https://www.youtube.com/watch?v=pygfthKNKL8&feature=youtube_gdata_player
Showing posts with label Diy. Show all posts
Showing posts with label Diy. Show all posts
Friday, June 20, 2014
Diy washi tape

Friday, May 16, 2014
DIY pizza lunchables
My kids love pizza, and even more when they get to take them to school for lunch. I'm not crazy about all the "stuff" they put into food anymore, so I try to find ways to make them myself, oh and by the way most the time it's cheaper. So this is how I make pizza lunchables mom style
I start with a simple thin crust pizza recipe
3/4 cups warm water (you should be able to put your fingers in it without a problem)
1 teaspoon active-dry yeast
2 cups all purpose flour
1 1/2 teaspoon salt
1. Mix your yeast into your bowl of water and set it to the side.
2. Preheat oven as high as it will go. Mine is 550
3. Mix your flour and salt together in a bowl, then add your yeast water mix. Mix together then need until you have most the flour mixed in.
5.You don't have to let it raise. I use a rolling pin to roll it out as thin as I can get it, maybe 1/8 a inch or so.
6. Cut into a size that will fit in a sandwich bag. I use a cookie sheet or a pizza pan to cook them on. I place a thin layer or flour before and place in over.

7. Rub some oil on top and use a fork to make some holes, then place in oven
8. Keep an eye on them because they will be done quick. In my oven it's 5-7 minutes.

When lunch times comes around, send the little ones with some cheese, pizza sauce, and pepperoni if you want.

I made a double batch and it'll make about 10 meals for my kids. I keep some out for fresh and flash froze (place on a cookie sheet in a single layer, without touching) and put in the freezer for an hour or so. Once it's froze some you can place in a large bag for freezing. Flash freezing makes it where you can pull one out at a time, not just have a big frozen lump.
I start with a simple thin crust pizza recipe
3/4 cups warm water (you should be able to put your fingers in it without a problem)
1 teaspoon active-dry yeast
2 cups all purpose flour
1 1/2 teaspoon salt
1. Mix your yeast into your bowl of water and set it to the side.
2. Preheat oven as high as it will go. Mine is 550
3. Mix your flour and salt together in a bowl, then add your yeast water mix. Mix together then need until you have most the flour mixed in.
5.You don't have to let it raise. I use a rolling pin to roll it out as thin as I can get it, maybe 1/8 a inch or so.
6. Cut into a size that will fit in a sandwich bag. I use a cookie sheet or a pizza pan to cook them on. I place a thin layer or flour before and place in over.
7. Rub some oil on top and use a fork to make some holes, then place in oven
8. Keep an eye on them because they will be done quick. In my oven it's 5-7 minutes.
When lunch times comes around, send the little ones with some cheese, pizza sauce, and pepperoni if you want.
I made a double batch and it'll make about 10 meals for my kids. I keep some out for fresh and flash froze (place on a cookie sheet in a single layer, without touching) and put in the freezer for an hour or so. Once it's froze some you can place in a large bag for freezing. Flash freezing makes it where you can pull one out at a time, not just have a big frozen lump.
Monday, May 12, 2014
Easy teacher gift
Ok so here's what I used:
Small jar from dollar tress
Smarties
And a sharper
Ribbon

I maybe small note that when on top that said Thanks for making us smarties and sharpies
I already have the ribbon , but all together this won't cost more than 5 hours, and the teachers seemed to really love it
Small jar from dollar tress
Smarties
And a sharper
Ribbon
I maybe small note that when on top that said Thanks for making us smarties and sharpies
I already have the ribbon , but all together this won't cost more than 5 hours, and the teachers seemed to really love it
Saturday, May 10, 2014
How to make your own Laundry soap
What do you need you ask
2/3 cup bar soap (you'll want this grated)
1/2 cup washing soda ( not baking soda lol I've done it)
1/2 cup borax
A large bucket
2/3 cup bar soap (you'll want this grated)
1/2 cup washing soda ( not baking soda lol I've done it)
1/2 cup borax
A large bucket
Put a pot on the stove with 6 cups water and your soap, heat up until all the soap has melted. Set your heat to about medium, I never do and it seems like it's boiled over and I got to clean my stove at the same time. This step takes the longest, maybe 10 minutes but I've never timed it.
Once your soap is melted add the washing soda and borax, keep on heat until it has dissolved.
Move soap mixture to bucket, carefully it's like lava, and add 4 cups hot water ( as hot as your tap water will go. Give this all a good stir, then add 1 gallon and 6 cups (16 cups) hot water.
Let it sit and cool for at least one hour, stirring occasionally. Then just put it into some form a storage container, I use rinsed out 2 liter bottles and that seems to work pretty well. I just kept one of my old Laundry detergent bottles that I fill up. Use 1/2 cup per load, same as my Landry detergent bottle lid.
Yes it takes some time, but it's pretty cheap to make, and good for sensitive skin. It makes me 3 to 4 2 liter bottles worth of soap, so with my family and how much laundry we have only really have to make it once maybe twice a month.
Friday, May 9, 2014
Make a Dry erase board
Okay so here's a project that was super easy to do.
I picked up a picture frame at a yard sale. You'll also need a sheet of card stock, you could use lined notebook paper.

Remove your glass and trace it on your paper, cut your paper. I wrote the days of the week on mine, just so everyone can see what's going on for the week.

Put your glass back in the frame, add your paper, and the back of the frame, hang. There I told you it was easy.
I picked up a picture frame at a yard sale. You'll also need a sheet of card stock, you could use lined notebook paper.
Remove your glass and trace it on your paper, cut your paper. I wrote the days of the week on mine, just so everyone can see what's going on for the week.
Put your glass back in the frame, add your paper, and the back of the frame, hang. There I told you it was easy.
Thursday, May 8, 2014
Glitter dividers
I made my first video today. I hope you enjoy it. Share and pass it around. Glitter planner dividers: http://youtu.be/WxD2lyL2FW4
Tuesday, April 15, 2014
Mommy needs coffee
Good news I can walk on my broken foot again, the down side the house
needs cleaning. My husband has done a great job doing both of our jobs,
and keeping the home running. Now that I'm up and moving it's time to
give a good cleaning. My crafting has had to take a back seat :-(
This morning I woke up to get to work. Time to get a cup of coffee and get started. What do you mean I don't have coffee creamer?

I like this one, it's just caramel, but sometimes hard to find (they like to add vanilla ). Well I was out, so I made some up.

All I needed.
A jar
Measuring cup
14Oz sweetened condensed milk (one can)
1 3/4 cups milk (I used whole milk)
2 tablespoons of caramel ice cream topping
Put the sweetened condensed milk, milk and caramel in jar. Put the lid on the jar. Not hard so far right? Ok here's the hard part, are you ready? Time to shake, shake, and shake. Done

Now time for my cup of coffee, and then get to work.
This website http://fun2bfrugal.com/homemade-flavored-coffee-creamer has a lot of different flavors to pick from.
I love this creamer and now I'm ready to get to work.
This morning I woke up to get to work. Time to get a cup of coffee and get started. What do you mean I don't have coffee creamer?
I like this one, it's just caramel, but sometimes hard to find (they like to add vanilla ). Well I was out, so I made some up.
All I needed.
A jar
Measuring cup
14Oz sweetened condensed milk (one can)
1 3/4 cups milk (I used whole milk)
2 tablespoons of caramel ice cream topping
Put the sweetened condensed milk, milk and caramel in jar. Put the lid on the jar. Not hard so far right? Ok here's the hard part, are you ready? Time to shake, shake, and shake. Done
Now time for my cup of coffee, and then get to work.
This website http://fun2bfrugal.com/homemade-flavored-coffee-creamer has a lot of different flavors to pick from.
I love this creamer and now I'm ready to get to work.
Monday, April 7, 2014
Mom can we play slip and slide...
Slip and slid down the stairs that is. Well that's what it felt like
anyways. We live in the woods, so our steps always seemed to be damp
with some kind of film. Not nice stuff, not at all. We tried grip tape
but after about a week or so it would come off. Was I cursed? My dad
came to visit and we got to talking about it. More me tell him to be
careful. My dad has worked construction most his life, why I didn't
think to ask him before is beyond me. He gave me the best idea.
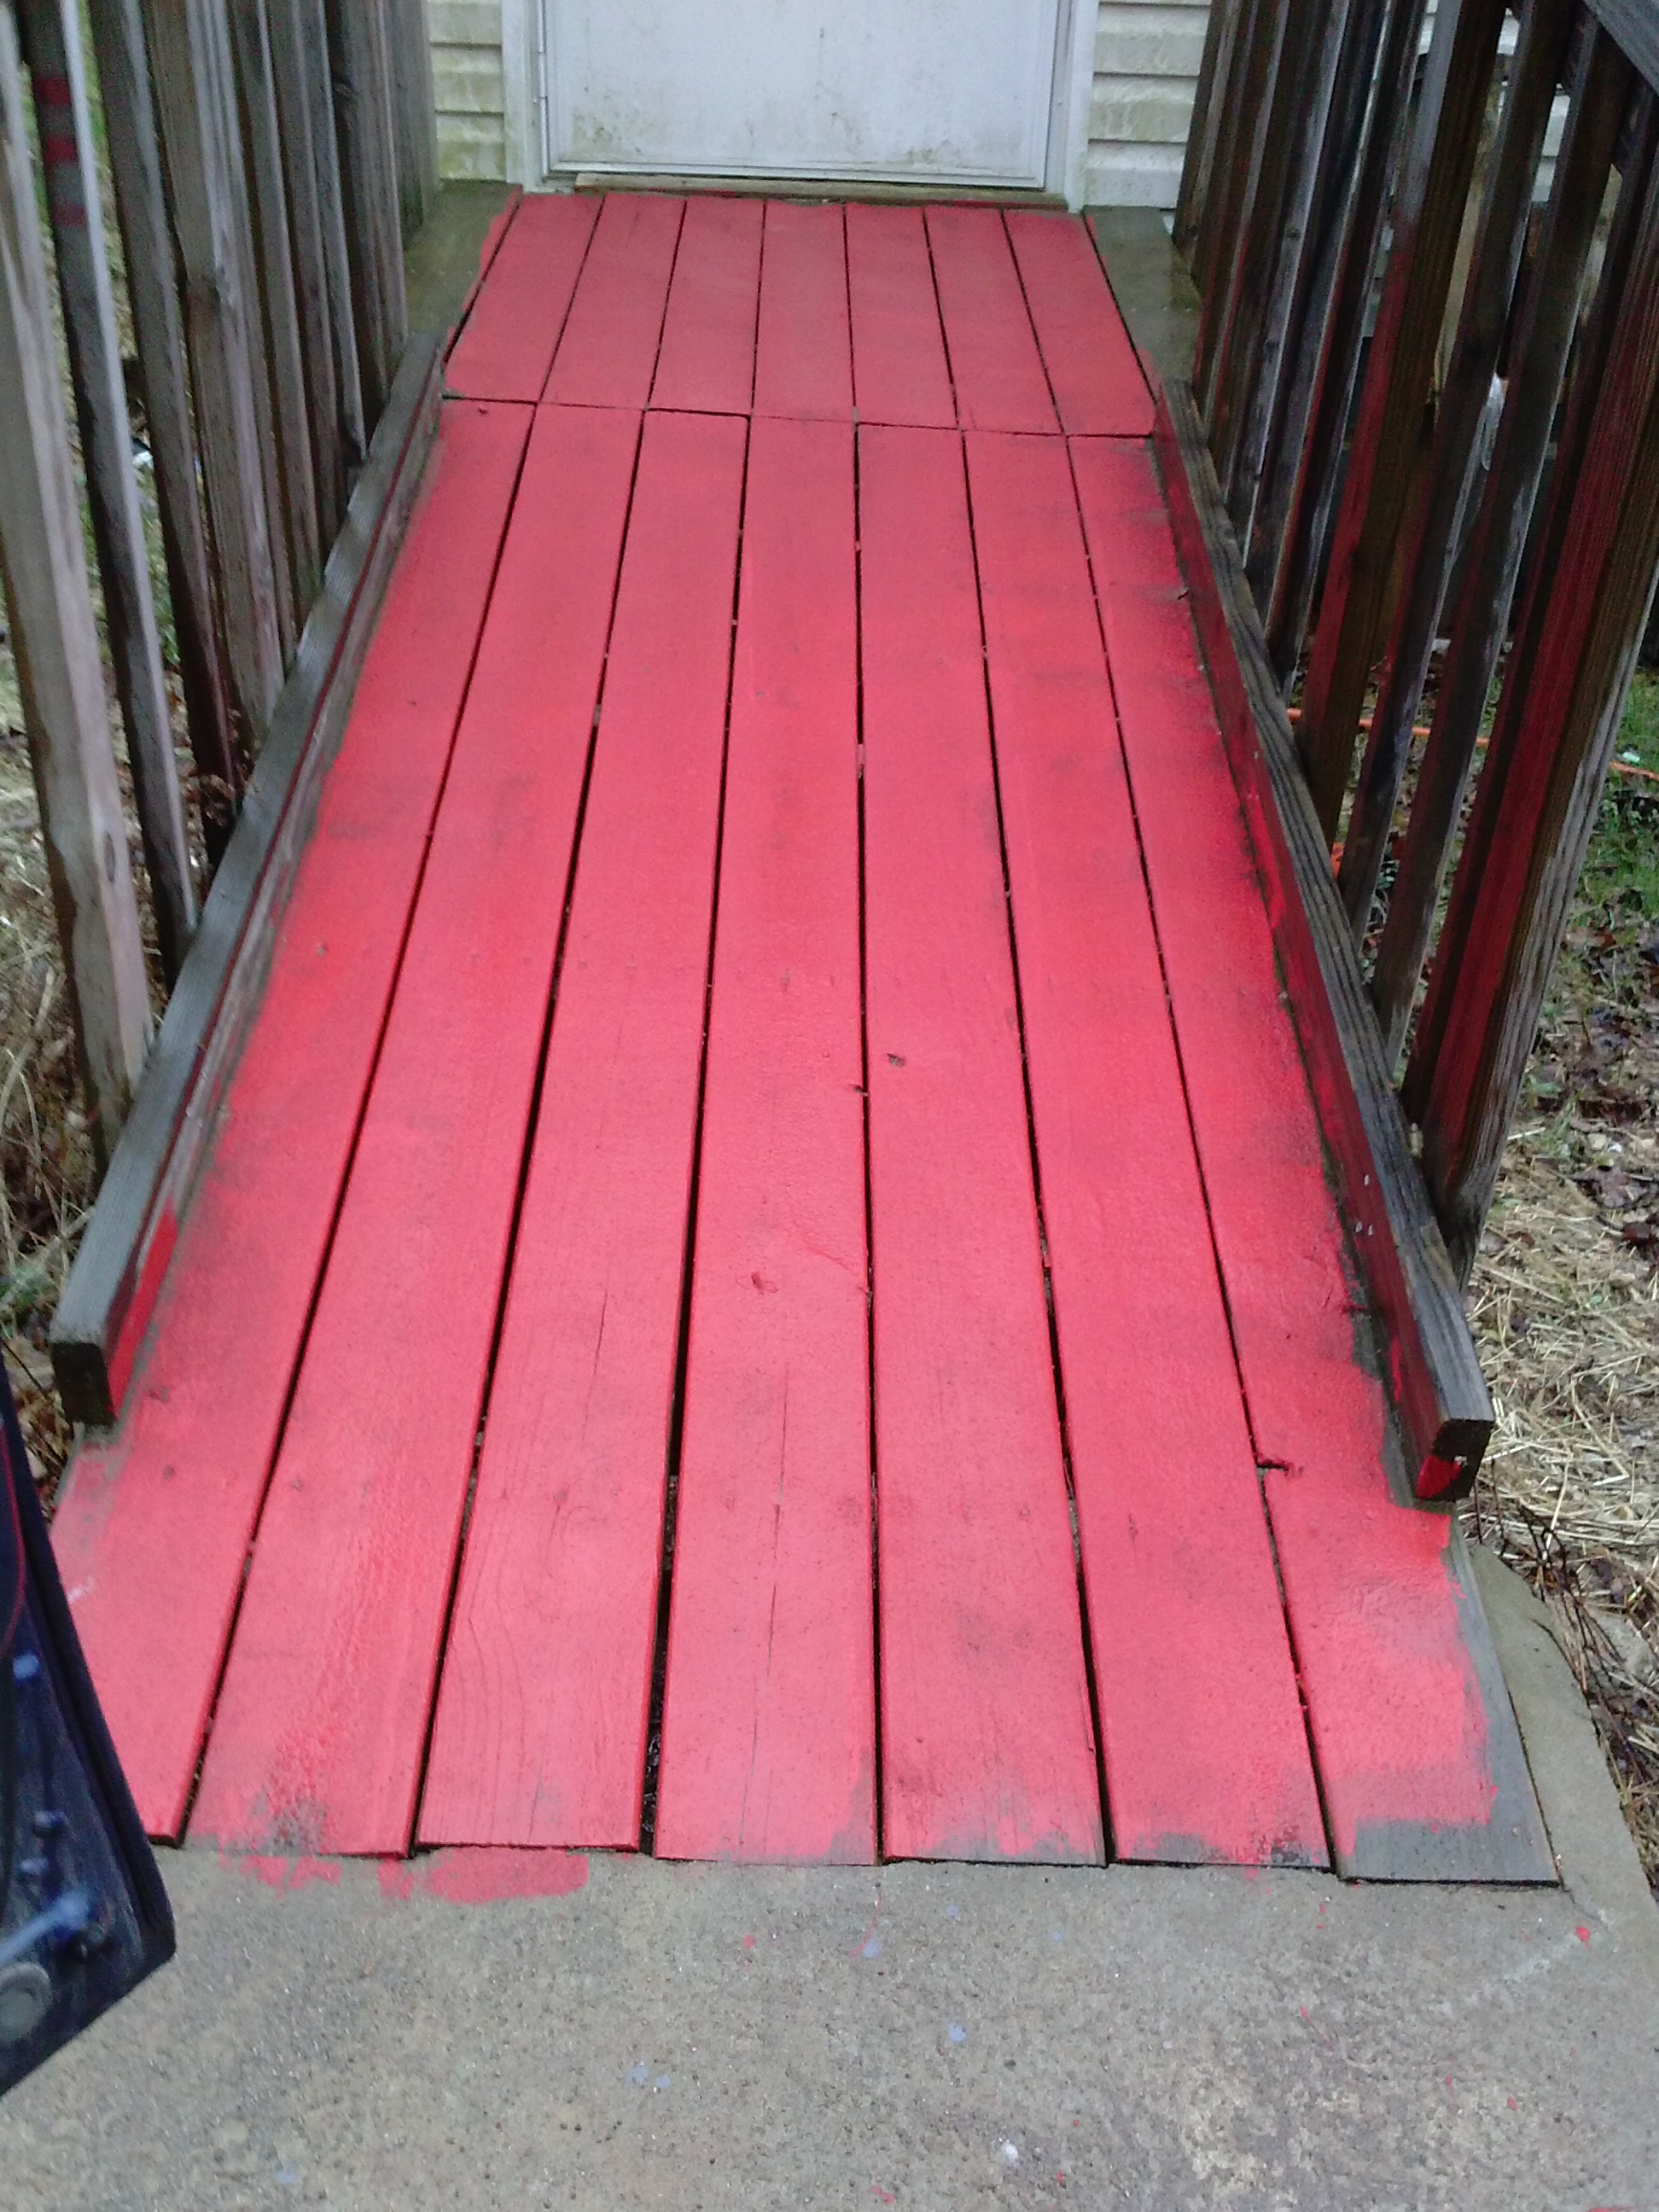
Paint your steps first, while the paint is still wet cover with sand. After the paint is dry brush off the extra sand, and put another coat of paint on it. How easy is that? Now we may have to do it again at some point, but I'm sure it'll last longer then the other stuff.
I thought I would share this with everyone.
Paint your steps first, while the paint is still wet cover with sand. After the paint is dry brush off the extra sand, and put another coat of paint on it. How easy is that? Now we may have to do it again at some point, but I'm sure it'll last longer then the other stuff.
I thought I would share this with everyone.
- Yes it's very red lol
Subscribe to:
Posts (Atom)